Using Hyper-V for Building a Private Cloud - Part 9
In the previous article, we specifically focused on registering a business unit and infrastructure request. It demonstrated the entire procedure end users require to submit requests to creating virtual machines. Now, it’s time I show you the procedure required to approve infrastructure request. Once the request is approved the end users will be able to create virtual machines.
Approving Infrastructure request
We will begin the process assuming that a user has submitted a request so that it will make it easier for user understanding. If you click on the Request tabs, you will find details of the request pending, check the image below for reference. Unless a request is configured, you cannot approve it. You can see a dialog box in the image that prompts the message. To continue the process, you need to configure the services and here is how you can do it.
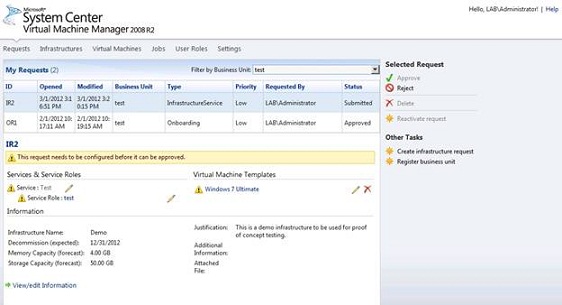
Infrastructure Requests Configuration
Service Configuration
Click on the service name that will take you to the Edit Services page. On the Edit Services page, you will find template library and virtual machine location that is specifically targeted to the information that still requires configuration. By clicking on Assign Library, you can provide a template library to it.
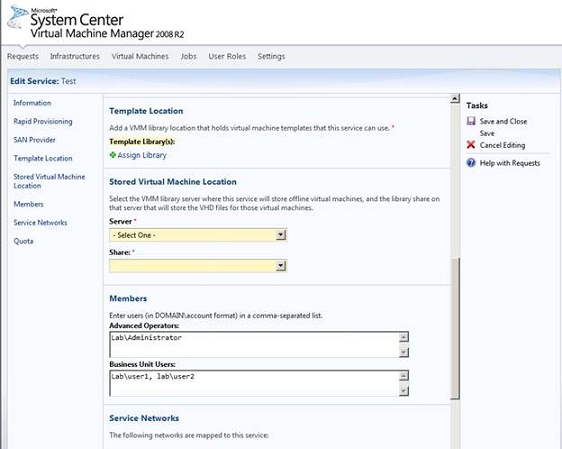
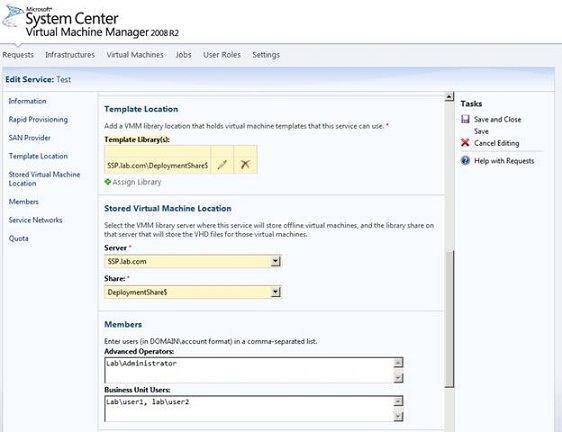
Once you click on the Assign Library link, a new dialog box will roll down wherein you need to choose the Library Server and Library Share, you would like to use for the service. After providing the required details, you will be able to select a deployment share and a server.
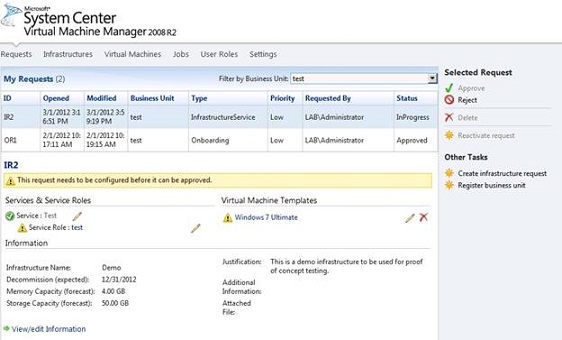
Verify the information and then click Save and Close. When you return to the request page, you must see a green check mark (as shown in the image) that defines the service is configured appropriately.
Service Role Configuration
Now, there are two other request that needs to be configured as you can see in the screen. So, we need to get back to the procedure and click on the name of the service role. This will be followed by a load balancer screen where you only need to select the Action XML, linked with the service role. Since the Load Balancer section is optional and is not enabled, configuration is not required.
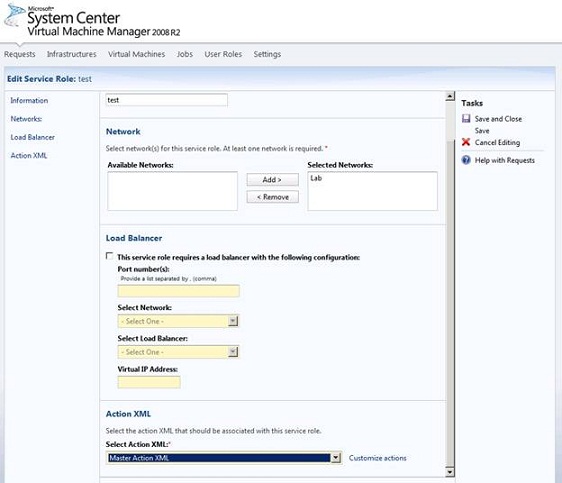
Simply end the process by clicking Save and Close and when you return to the request page, you must find a green check mark next to the Service Role that indicates it is configured correctly.

Virtual Machine Template Configuration
Now, it’s time to configure Virtual Machine Template. You can start by clicking on the template. Here, you don’t have go through a long procedure and you can complete the configuration by simply clicking Save and Close. On the request page, you will find a green check mark that indicates a successful configuration.
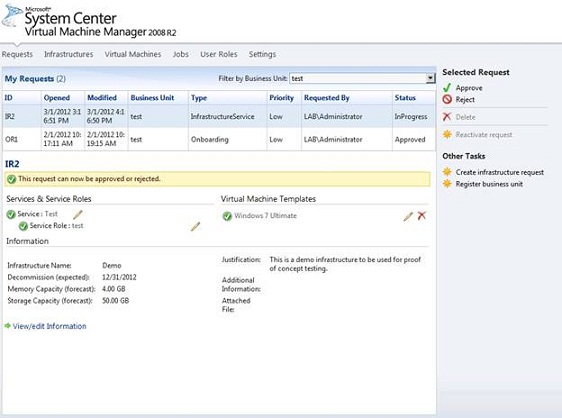
Since we have successfully configured all the request, you can now go ahead and approve them by clicking Approve.
Creating a Virtual Machine
Once you approve the request, the end user will be able to create virtual machines. To get started, follow the steps below.
Step 1:
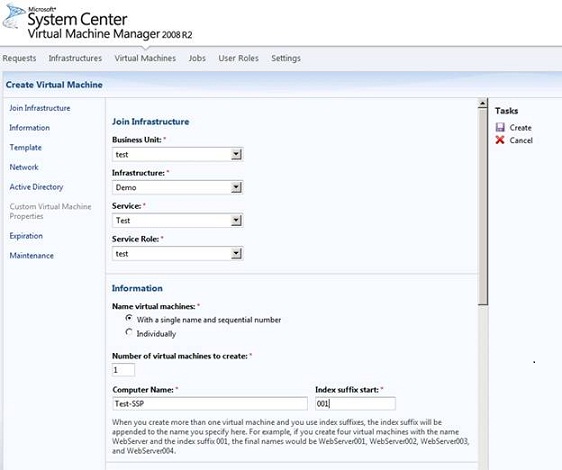
Begin the process by logging in as a user and then select the Virtual Machines tab.
Step 2:
Now, you will have to create a virtual machine. To do so, click on Create Virtual Machine.

Step 3:
In the Join Infrastructure section, you need to select the Business Unit, Infrastructure, Services and Service Roles. The infrastructure, service and service roles that were approved previously will only be available to the end user. Next, you must choose the Name virtual machines, provide the number of virtual machines you wish to create, mention a computer name and index suffix number.
Step 4:
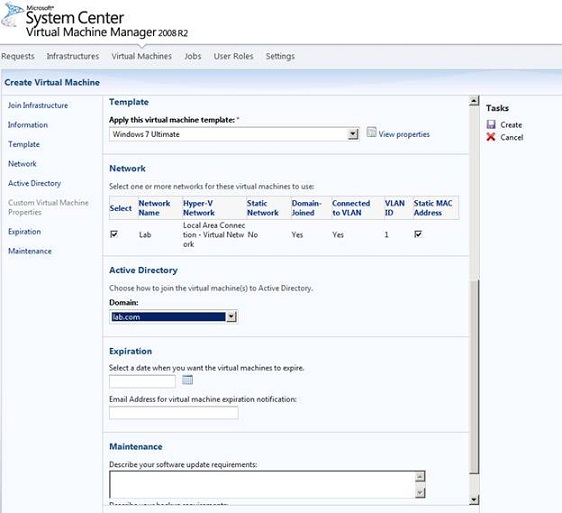
Scroll down and you will find an option to select a virtual machine template and also a network. Fill in the correct details and proceed.
Step 5:
Now, with just a click on the Create button, you can create the requested virtual machine/machines.
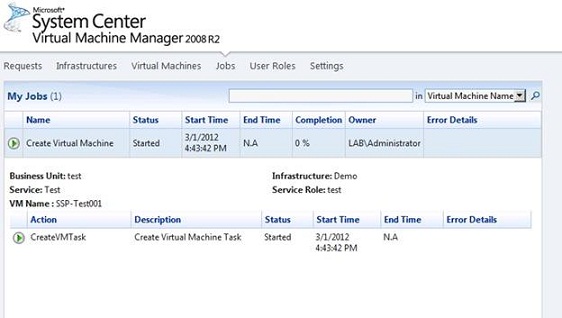
Step 6:
Once you click Create, the screen will automatically direct you to the Jobs tab where you can check the virtual machine creation process.
We have completed the process of creating a virtual machines and have given users a full-fledged opportunity to create their own virtual machine. Congratulate yourself as all the efforts you put into this has certainly offered you a successful outcome. And if not, then there is nothing to be concerned about as you can get things done correctly and clear the errors rather smoothly and efficiently.
Next article will be the last part of the series where I will provide some security tips and discuss on troubleshooting techniques.