Using Hyper-V for Building a Private Cloud - Part 4
Up to this point, I showed you several steps that is probably structuring steps toward building your own private cloud server. In the previous piece, I guided you to create a deployment image and adding it to the Windows Deployment Server. Though, whatever images are generated until now, can’t be put to use. Before we create a private cloud, and generate the virtual machines on the fly through a self-service portal, the deployment images need to be normalized. This part will demonstrate the same. This process will enable cloning of the virtual machine as many times as required and necessary.
Steps to Normalize Deployment Image
To start the process, use a server that’s running Hyper-V to create a new virtual machine. Here’s how you can do it.
Step 1:
Open the Hyper-V Manager and choose New Virtual Machine from the Action pane. When it starts, click Next to skip the Welcome Screen.
Step 2:
In the next page, you will find a screen where you need to determine the memory you want to allocate to the virtual machine.
Step 3:
Choose a network adapter and click Next.
Step 4:
In this page, you need to mention the size of the virtual hard disk you want to use. Since the Hyper-V uses thin provisioning by default, the actual hard disk file will remain as large as the amount of data stored in it, even though you opt for maximum size of 2040GB.
Step 5:
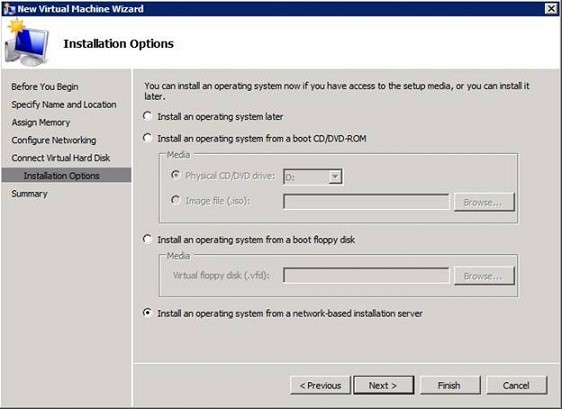
Select the option ‘Install an operating system from a network based installation server.’ Now click Finish to create the virtual machine. Refer the image below.
Steps to Installing Windows
Step 1:
When you get started, you will find the Main Hyper-V Manager Screen. Double Click on the newly created virtual machine to view it. Initially, the virtual machine is off, so you will have to Start command to turn it on. From the DHPC server, the virtual machine will receive an IP address and then, you have to quickly press the F12 key to begin the network boot so that the virtual machine is able to load the pre-boot process.
Step 2:
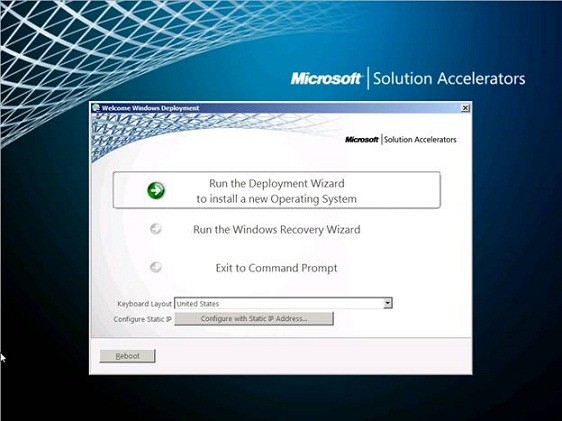
Before running the installation process make sure you select the keyboard layout as mentioned in the image. Click Run and then provide a username, domain and password so that you can connect to the deployment share.
Step 3:
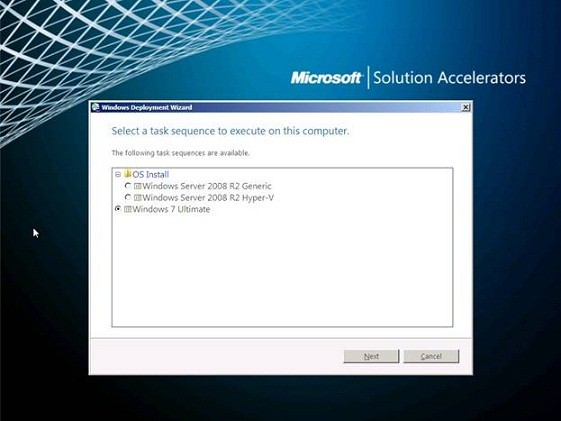
After entering your credentials, click OK and then you will need to select the Operating System that you want to install. Refer the image.
Step 4:
Click Next and then you will need to add a computer name. The name you choose would be irrelevant, so consider choosing the default name and click Next, as we are normalizing the deployment image.
Step 5:
This particular screen will display an option of joining a domain. However, this is certainly not the right point to join a domain, but you can select the join a workgroup option and click Next.
Step 6:
In the next screen, choose Do Not Restore User Data and Settings option and click Next.
Step 7:
Now select the appropriate language, time, currency format and keyboard layout and click Next. Choose your time zone and again click Next.
Step 8:
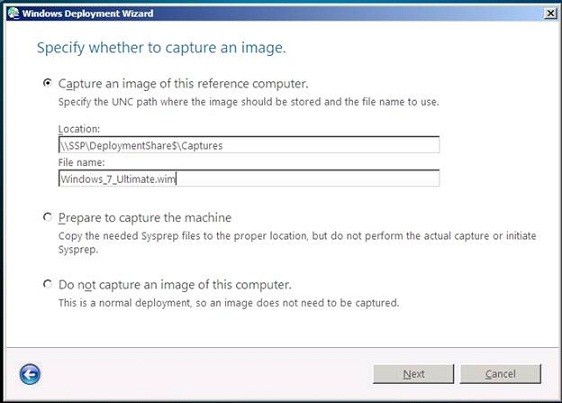
Make sure you select the ‘Capture an image of this reference computer’ option, since this part is very crucial. The Location field must point back to your deployment share and you must provide a unique name for the image that you are generating. Refer the image.
Step 9:
Now, click Next and then Begin. The pre-installation will begin installing Windows 7.
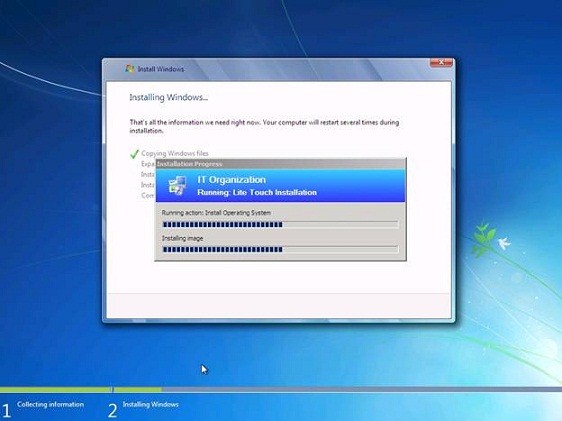
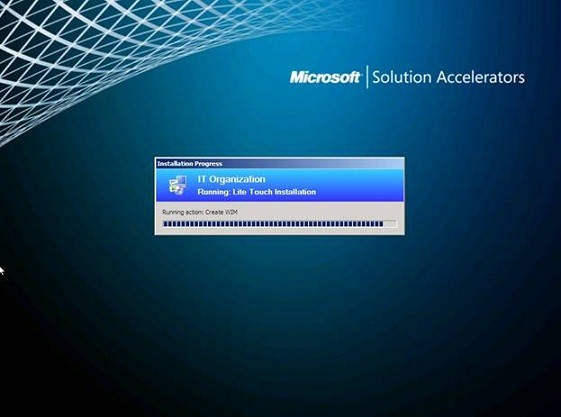
Step 10:
When the process completes, the computer will restart and the set up will continue. After that, the machine continues the pre-installation process and creates an image file, which is a .WIM file as shown below.
Now we have created an image that can be used to deploy other virtual machines and this is a step ahead toward creating your own cloud. Part 5 will guide you on how to build the private cloud infrastructure and how to use the image that you created to generate virtual machines within the cloud.