Using Hyper-V for Building a Private Cloud - Part 2
This article is a continuation of the previous discussion about building private cloud server that further demonstrates the procedure for creating deployment images that will be used in the cloud.
The previous article was basically on downloading, installing, and configuring Microsoft Deployment Toolkit. Now, I will be further guiding you to creating some Operating System images that we can host in the deployment share that we created.
Before you begin, you will have to create an ISO file of the Operating System you wish to deploy and copy it to your server. I have stored my ISO file directly on the desktop, but you can insert the installation DVD for the Operating that you wish to import. Besides, you can also copy the files from an installation CD or DVD to the folder of your choice, either on your server or on the network. Make sure you provide access to the proper installation media. Once done with it, login to your server with the administrative credentials. Then start the deployment workbench to proceed.
Adding Operating Systems for Deployment
Step 1:
Start the Deployment Workbench, click on Deployment Share where you will find the folder Operating Systems. Right click the Operating System and select Import Operating System, which will launch the New Folder Wizard.

Step 2:
Select the ‘Full set of source files’ and click Next. Then Browse to where your source files are stored and click Next.
Step 3:
The next page will ask you to enter a Destination Directory name and after completing the process, click Next. Review the submission i.e. the name and description you provided and click Next. Before you click Next, make sure the details you provided are correct.
Step 4:
The folder will be created and to complete the process, click Finish.
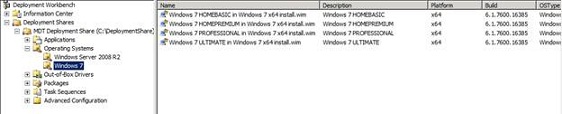
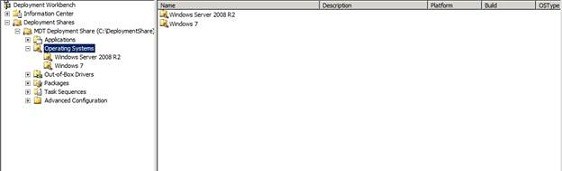
Once you create the first Operating System folder, you can create multiple folders that might be needed. But, I would be creating a Window 7 folder and Windows Server 2008 R2 folder.
Building a Task Sequence
The deployment images that we created will finally be used to create Virtual Machines within our private cloud computing, however, we can put it to some good use that will help us build our private cloud infrastructure. Building a task sequence is indeed the initial step that can be used to deploy a generic Windows server. Here is how you can create the task sequence.
Step 1:
Open the Deployment Share, then right click on the Task Sequence node. Select ‘New Folder’ and then use the resulting wizard to create a folder called OS install. After creating the folder, right click on the OS install Folder and select the New Task Sequence.
Step 2:
The next page will need you to provide an identification code for the particular task. Along with the identification code, you also need to provide a name to the task. After completing it, click Next. In the next page, click Standard Server Task Sequence option and click Next.
Step 3:
Select the OS you want to deploy and click Next. The following page requires you to enter product key. If you have multiple keys, then enter it or else you can choose the option not to specific the product key at this time.
Step 4:
Click Next and then enter your name, your organization’s name and the Internet Explorer home page and click Next. Then enter the local administrator password and click next.
Step 5:
In the following page, you will find a summary of your task sequence options. Review your entire submission and click Next to create the sequence. The final step is to click Finish and you will find a new task sequence listed within the OS Install Folder.
As I mentioned that we will be using the images to create the private cloud infrastructure, and for that purpose, we will require a task sequence to deploy the Hyper-V Server. In Part 3, I will be discussing about modifying the task sequence, which will be the next step in deploying our infrastructure services.