Using Hyper-V for Building a Private Cloud - Part 1
Cloud computing is the latest technology that has gained immense popularity over years among businesses. It is one of the many innovations that has eventually transformed the way we work in the technological world. It enables you to set up what is basically a practical office to give you the flexibility of connecting to your business, anywhere.
Though cloud servers offer considerable number of benefits to your enterprises, outsourcing servers to external clouds can make you depend entirely on your internet connection. If your internet connection is down or is bogged down due to excessive traffic, then your ability to access your servers will become difficult.
Our series is a complete demonstration on building a private laaS cloud in which new servers can be on the fly through simple web interface. In this piece, I have constructed the entire process to building your own private cloud by using Hyper-V that can be used to rapidly deploy different types of network servers.
Before we get started with the series, you need to ensure you have the Active Directory Infrastructure in place as this will create an ideal ground for the construction of cloud. If you have a physical domain controller in place, you can prevent further technical problems that can arise if you attempt to perform physical to virtual migration on your domain controllers.
Steps to Installing Microsoft Deployment Toolkit
Installing Microsoft Deployment Toolkit 2010 is the initial step in constructing cloud which is a free tool kit and can be downloaded from the web. An essential procedure to constructing cloud, initially you’ll have to install the Microsoft Deployment Toolkit on a physical server that will be accessible to other servers which generate the private cloud. There is absolutely no need to use a dedicated server as this particular toolkit is not a high demand application. However, the servers that you use will serve as a repository for the deployment images and thus, you need to ensure you have enough free disk place on the server that you use for the purpose.
Step 1: Installation
After you have downloaded the Toolkit, run the executable file and the Microsoft Deployment Toolkit setup will begin. Then, click Next, and accept the license agreement. Again, click Next and Install the components. Choose all of the components and then click Next, followed by Install and Finish.
Step 2: Create a Deployment Share
Next thing is to create a deployment share.

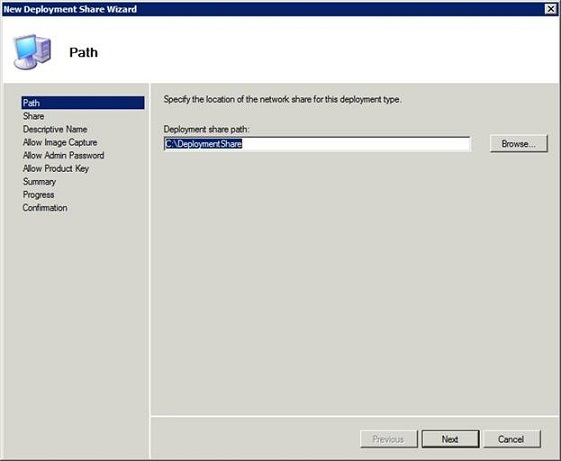
Open the Deployment Workbench, then right click on the Deployment Shares, and then click New Deployment. The New Deployment Share Wizard opens to path page. Refer the image.
Path Page
On the Path page, click Browse. Provide a name to the deployment share. Locate the folder and now click OK, followed by next.
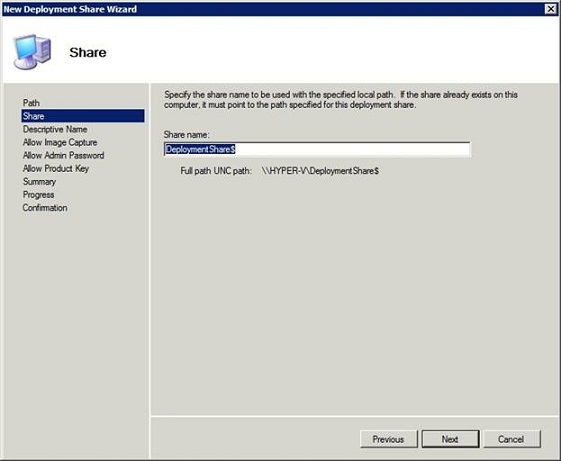
Share Page
On the share page, type the share name which here in the image is DeploymentShare$, and then click Next. The $ at the end of the share name renders the share invisible. The page will be followed by - Descriptive Name Page where you have to click next - On the Allow Image Capture, click next – On the Allow Admin Password page, click Next – On the Allow Product Key page, click Next – On the Summary Page, click Next.
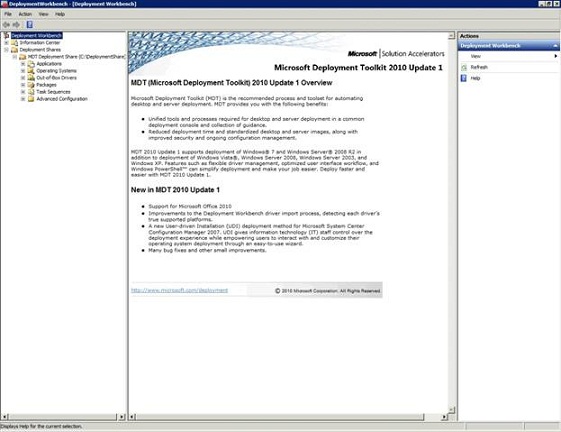
Expand the Deployment Share container and you will find a deployment share with the name you specified through the wizard. You will discover a number of sub folders in the share that we will be using when associating operating system images with the share. Check the image here.
Once we have completed the entire process of installing Microsoft Deployment Toolkit 2010, the next thing we will be proceeding with is adding operating systems to it. Find it in Part 2.